Download these instructions as a printable PDF file
How to edit your website’s content
Your website has two types of editable content:
1. Branching out Blog Posts.
2. Page text (such as Home, Bio, Hope, Links, etc.)
They are edited in slightly different ways.
2 Adding/Updating a Blog Post
Your Branching Out Blog Page age consists of separate items or ‘posts’ which are added via the Posts tab to the Dashboard Menu.
Each blog post has a category:
Natural Contract
The Common Story
Global Communications
Hope
Categories are important because they tell the site where to put a particular post. For example, a post with the category Natural Contract will appear under the Natural Contract tab on the Branching out page.
To add a new Post (or to edit an existing Post), first click on the Posts tab. You will see a list of existing posts.
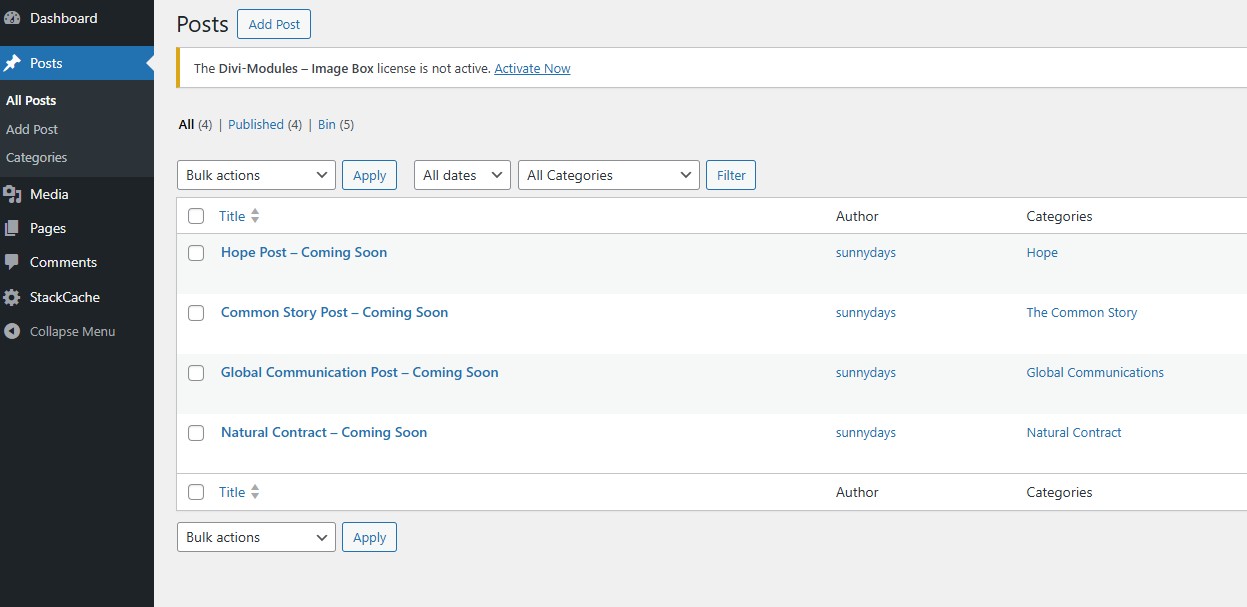
To edit an existing post, click on the Post title. This will open the standard WordPress text editor.
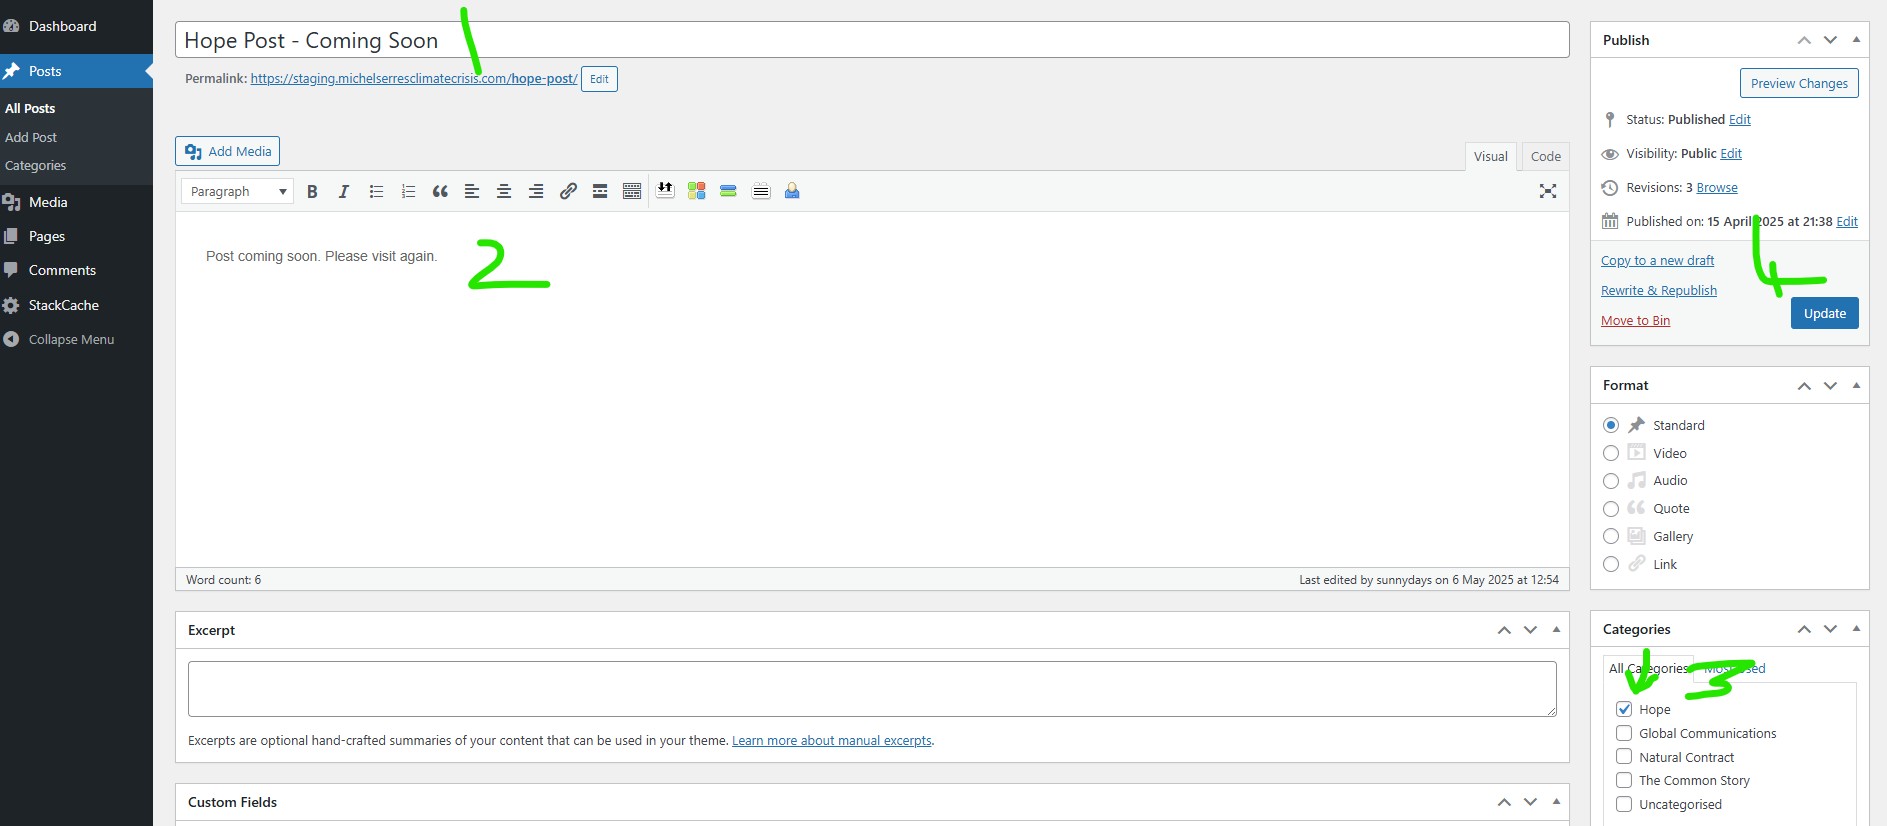
Here you can:
- Change the title
- Change the text (and add images via the Add Media button)
- Change the category (if necessary only)
- Click on the blue Update button to save your changes
We have provided training videos that cover the use of the WordPress text editor; see details below.
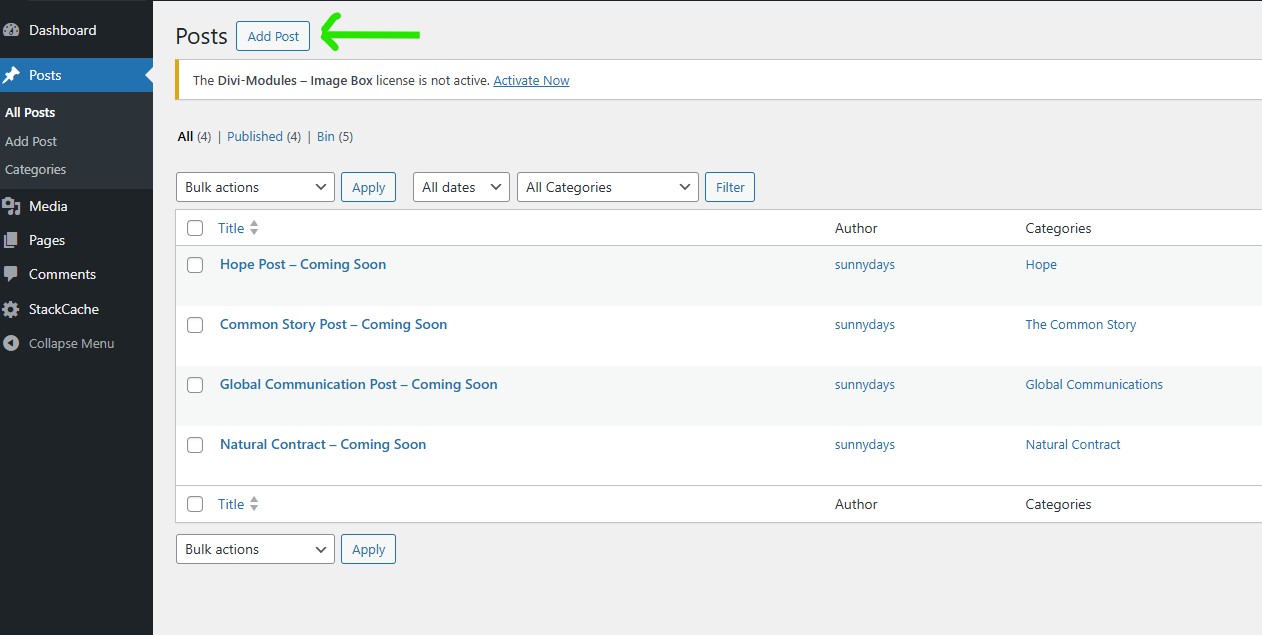
To add a new post, click on the Add Post button.
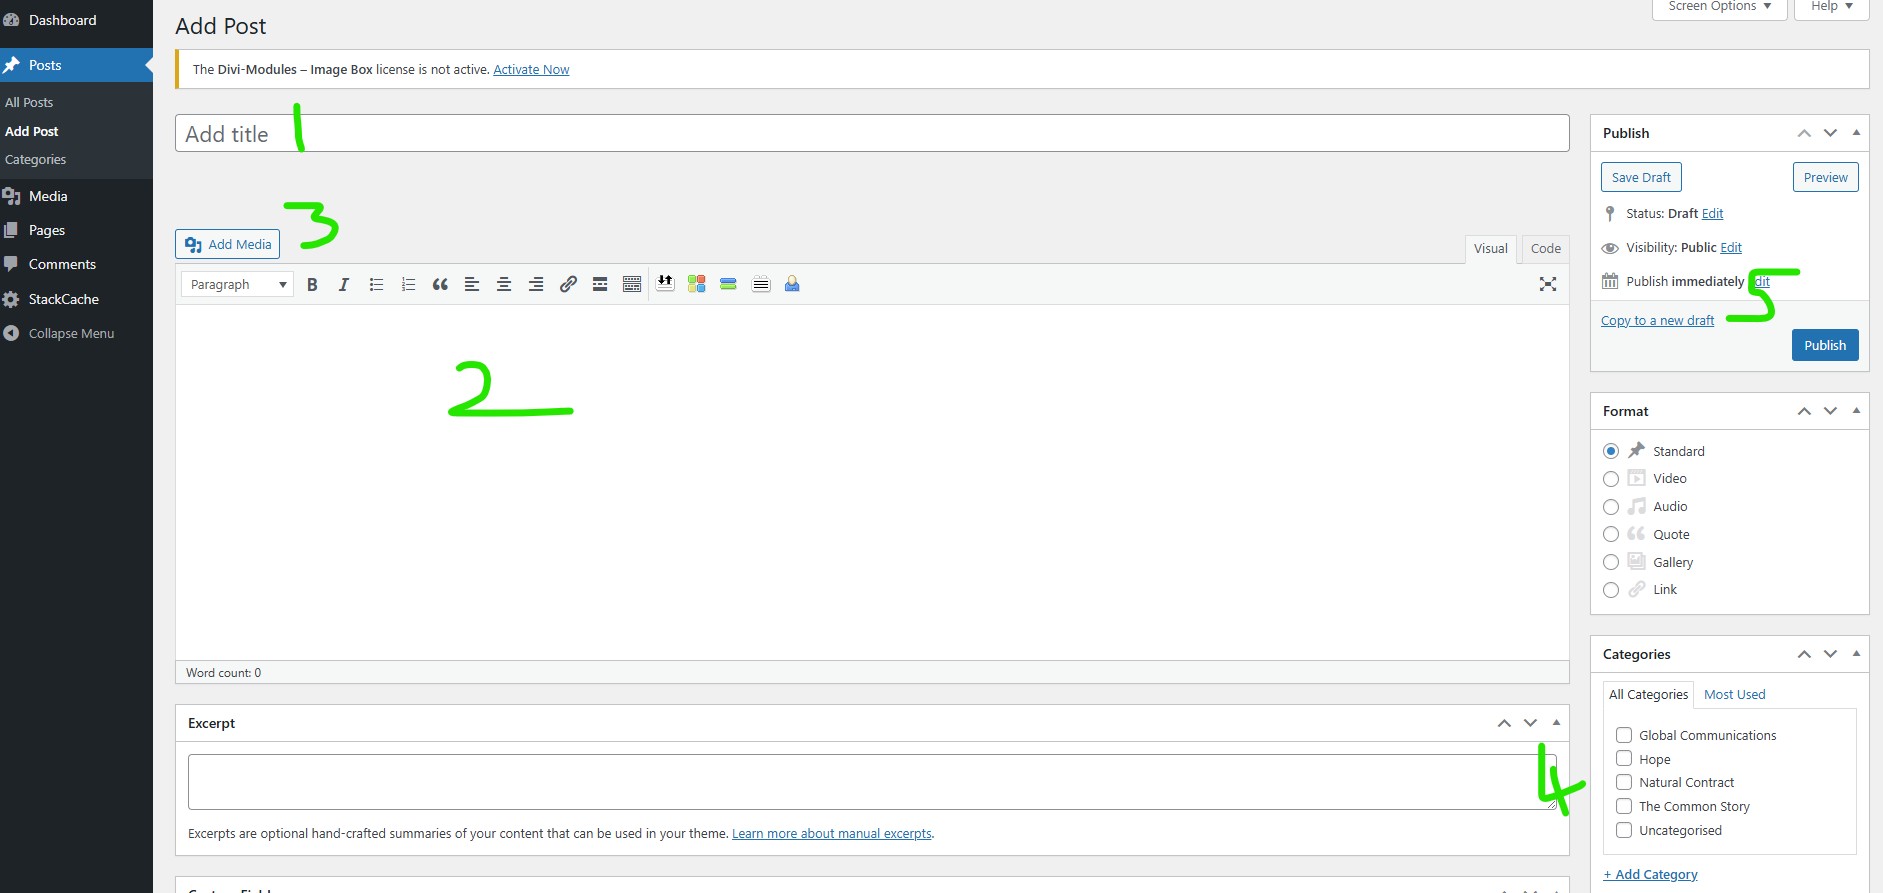
This will open a blank Post where you can add your details:
- Add the title
- Add some text
- Add some images
- Choose a category for the post (IMPORTANT)
- Click on the blue Publish button to save your changes
You can then check how the post looks and repeat the process as desired.
Responding to Comments
Over time, you may receive comments on your blog posts. To approve a comment, visit the Comments tab where you will see a list of comments. You can approve.
Select the comments tab and roll your cursor over the comment you wish to respond to. You will see these options:
- Approve a comment so it will appear on your website (comments will not appear until they have been approved)
- Unapprove – this will remove any comment from the site
- Reply – this will open a text editor where you can reply to the comment.
- Quick edit – you can change the content of the comment
- Spam – mark it as spam
- Bin – move the comment to the bin
Adding/Updating all other Pages
To edit a page, click on the Pages tab to the left of this area. You will see a list of your pages.
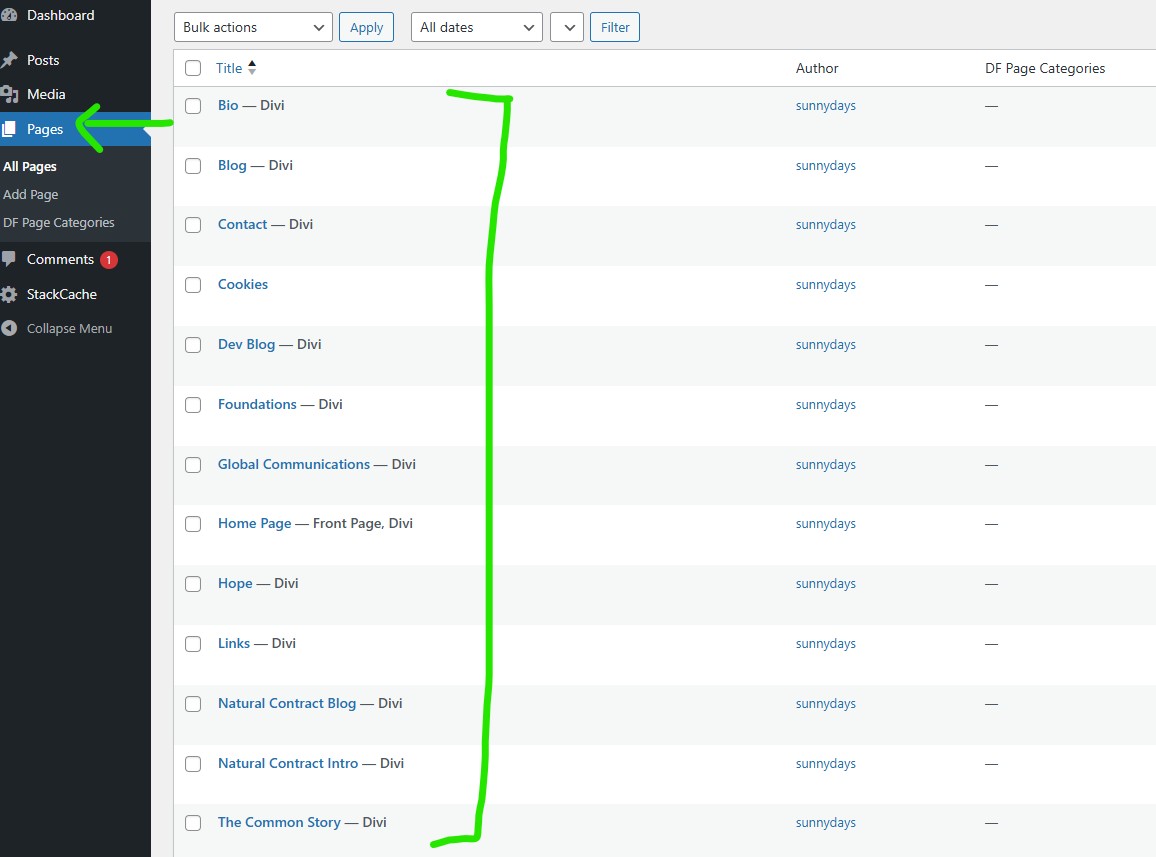
Click on the title of the page you want to edit.
For example, when you click on the title of the About page, the editing screen will look like this:
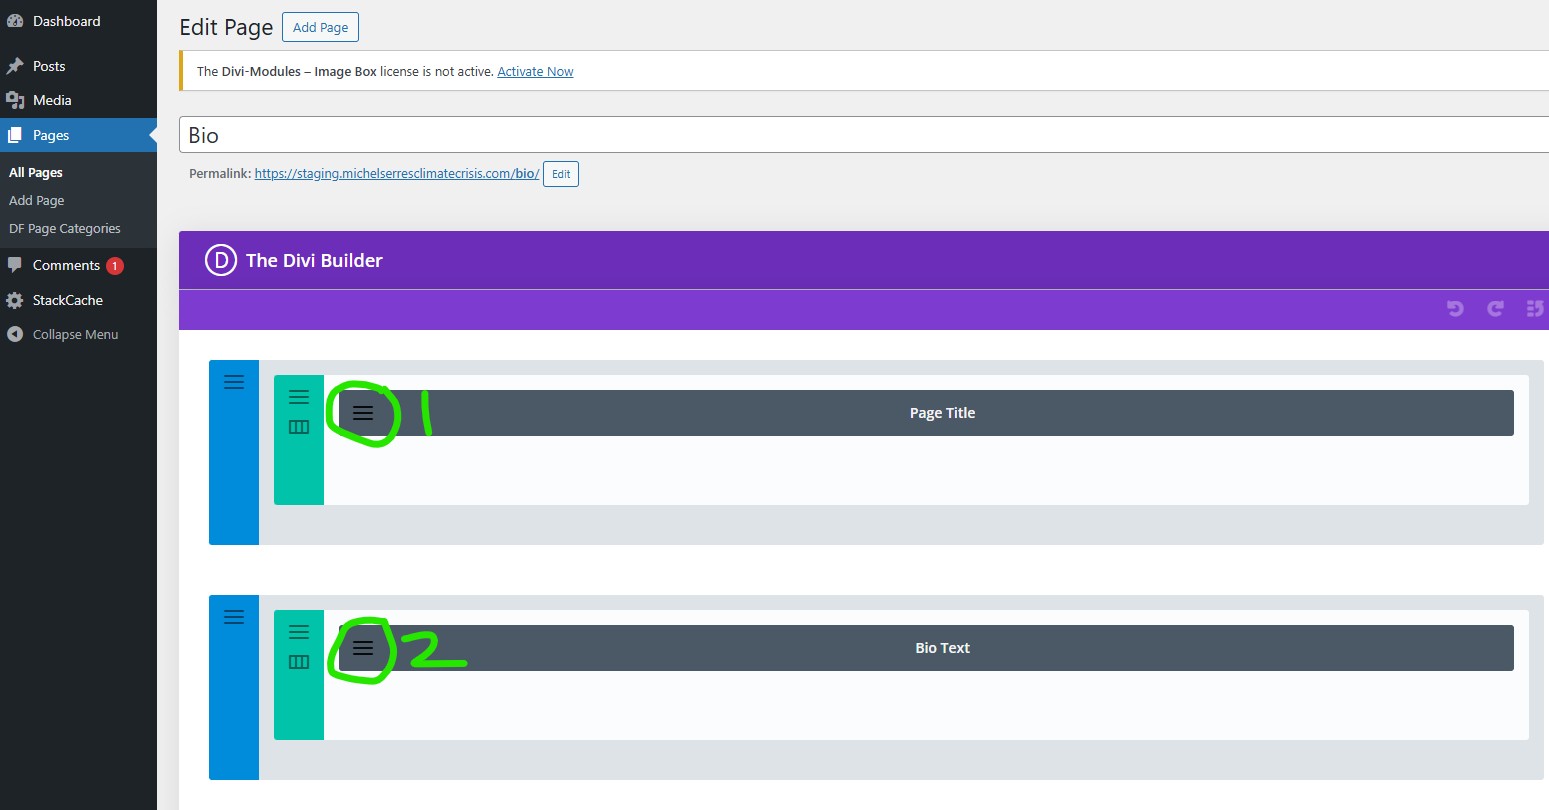
The labelled grey bars represent your content areas. Click on the three horizontal lines to open the editor for each named section on your page.
For example:
1. If you want to edit the title text on the page, click on the grey lines on the Page Title section (circled in green 1). This will open a text editor and you can make your changes.
2. If you want to edit text on your bio page, click on the grey lines on Bio Text section (circled in green 2). This will open the media library where you can choose or upload a new image.
This is how the text editing screen looks:
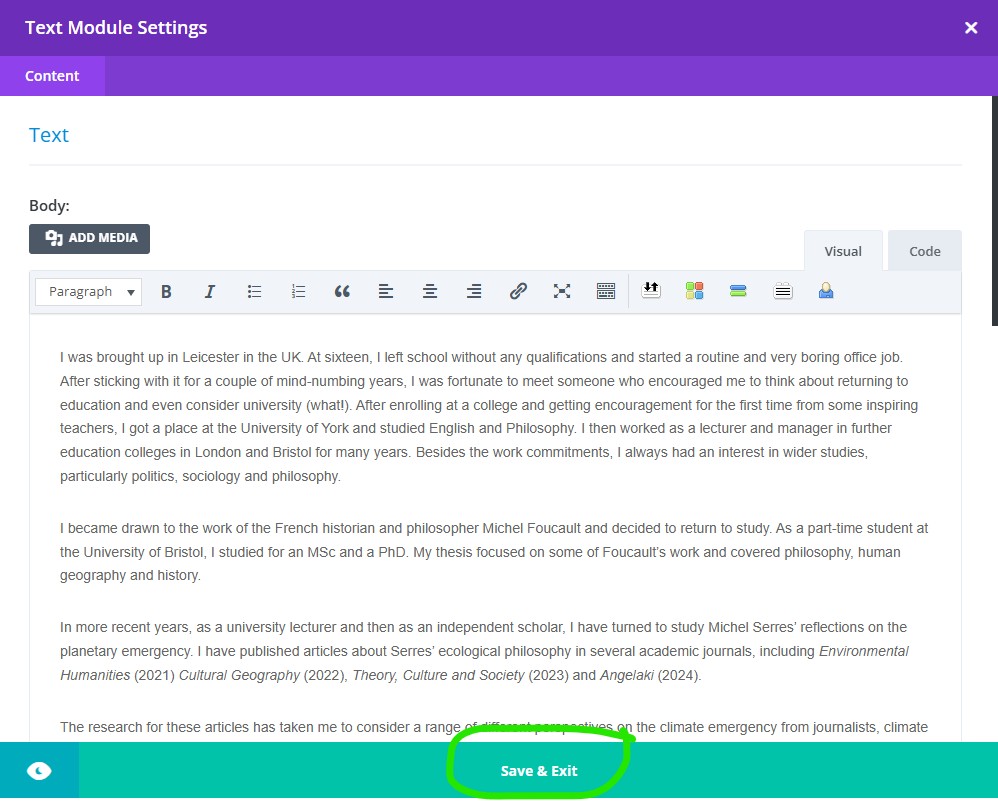
When you have made your changes, don’t forget to click the green “Save and Exit” button.
Then check how your page looks on the front end of the site.
Tip: It is a good idea to have two tabs open in your browser – one showing the editing screen and the other showing the front end of your site.
Note: Any areas in green are known as ‘global elements’ and any changes made to these will affect all instances of the element on the site.
Note: Caching issues may be a problem when saving your work. For example, you may save your changes and then find that they are not showing on the front end of your site. In fact, if you have saved your changes, they will have been made at server level, but your web browser is showing you an old version that it has stored for you. The solution is to clear your browser’s cache (consult your browser’s support on how to do this) or to try looking at your page on a completely different computer or mobile phone. If the problem persists, try again in a few hours. If the problem persists, please get in touch and we will investigate further for you.
Editing Images
If you want to change an image on the page, first upload your image to the media library via the Media tab on your dashboard. Then go back to your page editing screen and choose the Image box. Follow the instructions to upload the new image from your image library. View the training videos for more information on how to upload an item to your media library.
Note that any images uploaded to the site are automatically resized to 1200px wide. This process can take a few minutes, we advise that you upload your images at the beginning of an editing session so they will be ready for use when you edit your pages.
WordPress Training Videos
On our training site, you can view some general WordPress training videos. If you are new to WordPress, we strongly advise you look at the videos as they provide a good introduction. There are videos on how to upload images, how to display images, how to add links to your pages etc. To view the videos, click on the member login link below.
Username: (do not enter email address if asked – use password below):
Training
Password:
PeachMangoCatLemon-007
Both are case sensitive.
After you login, you will see blue links to the videos at the top and bottom of the page. Click on either.
Paid-for Editing Service
WordPress can be difficult to master. If you do not have the time or technical inclination to edit your site, you can always use our paid-for editing service. We charge by the hour for our time. Our average update invoices are between £15 and £30 (depending on what exactly needs doing). Just email your brief and any media you want to include to studiowebsites@gmail.com.
Editing support
If you have any queries about how to edit your site, please email studiowebsites@gmail.com or liz@bookwebs.co.uk Please give full details on what you are trying to do, what page, what image, what the problem is etc. We aim to respond within 24 hours but in busy times, response time can be up to 48 hours. We do not offer editing support during stated holiday periods.